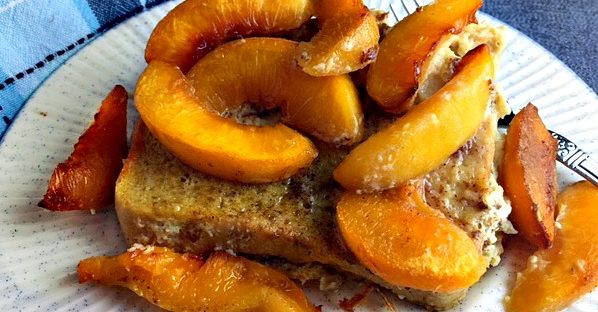
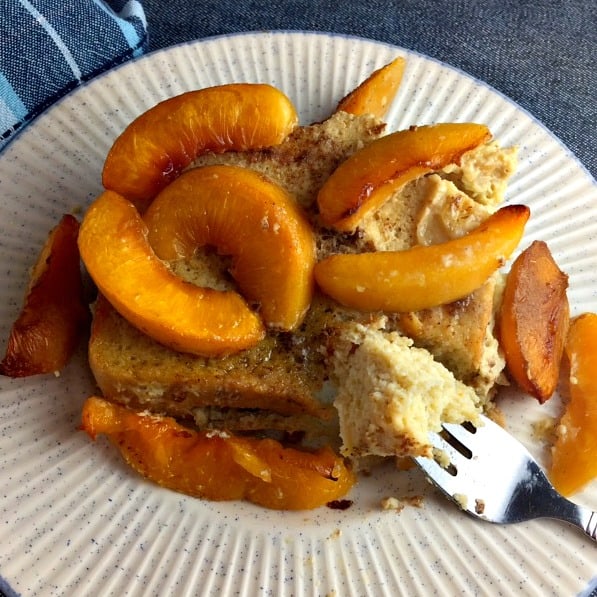
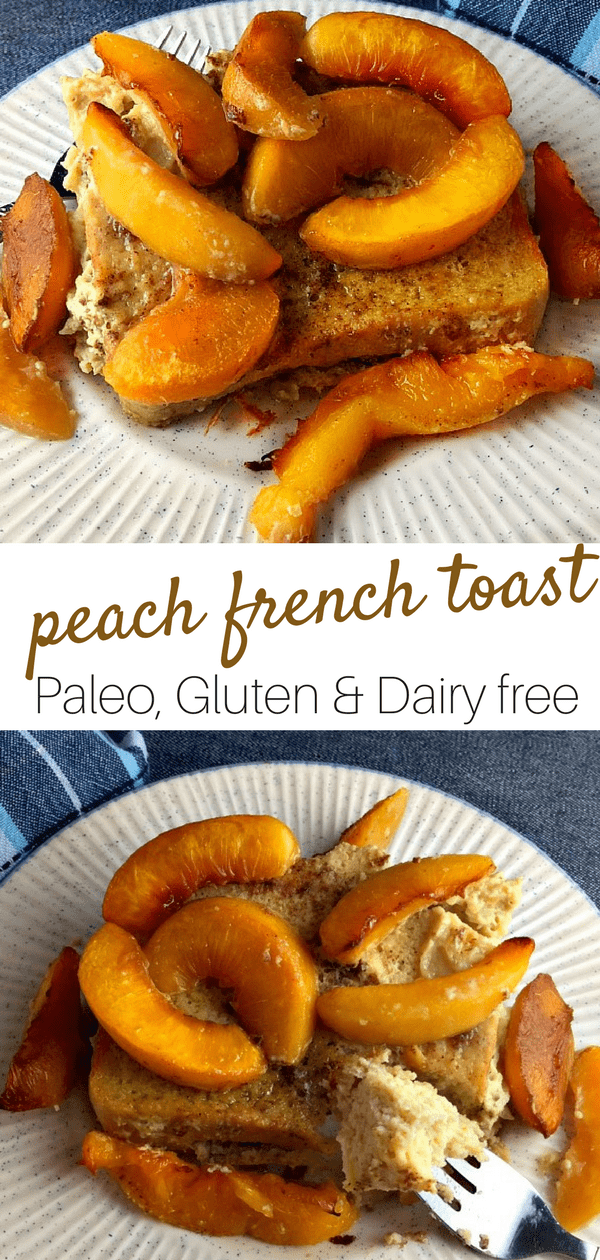
Let the aroma of cinnamon and peaches wake your family up in the morning with this overnight Paleo Peach French Toast. This recipe contains no grains and the almond flour makes it super moist and delicious! It’s great to make ahead for a brunch crowd as it has to sit overnight in the fridge.
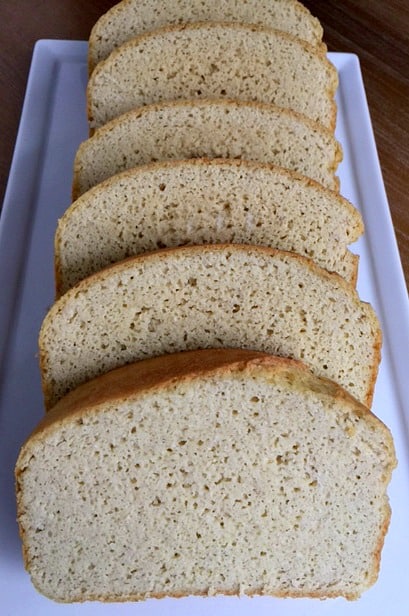
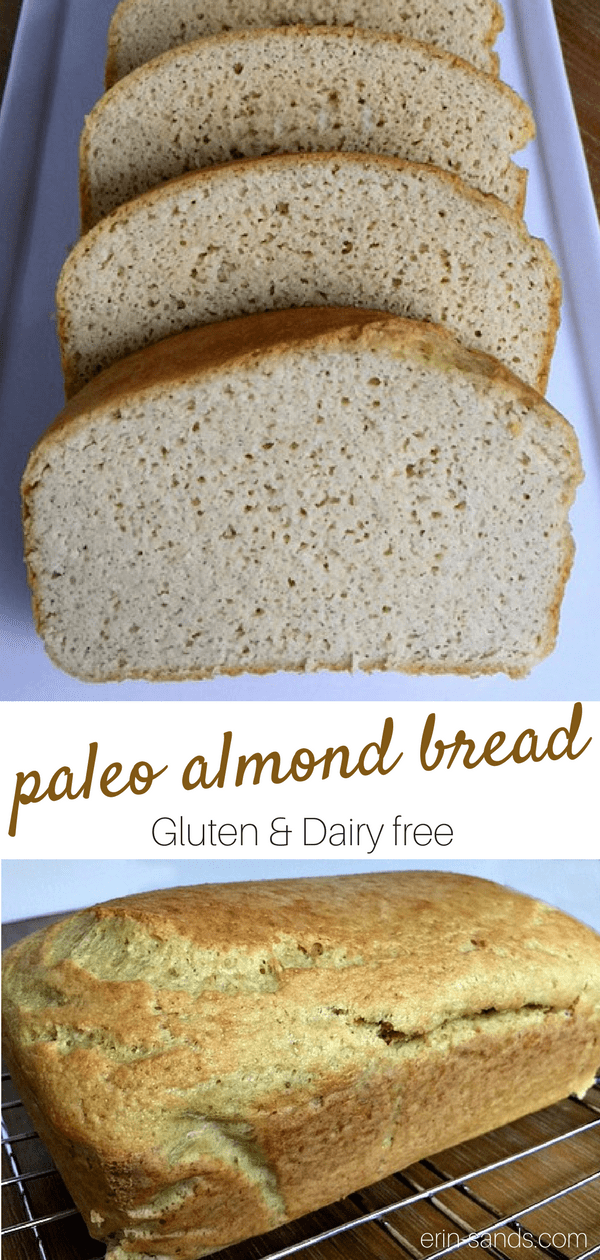
The Easy Almond Bread is so versatile, you can eat it on its own, or toast it and have it with jam, or even make a sandwich with it. You can make the loaf ahead and keep it in the freezer until you are ready to use it. You’ll need lots of eggs for this recipe. This is a protein filled breakfast.
I also recently discover Elmhurst Nut Milks because let’s face it, sometimes it’s just convenient to buy nut milk already made, but unfortunately most are loaded with unhealthy ingredients like carraganeen. Unsweetened Elmhurst milks are just nuts and water, and they taste delicious!
No need for syrup on these! The peaches give it just the right sweetness. Try adding some chopped pecans for a bit of a crunch! Let me know how it turns out in the comments below.
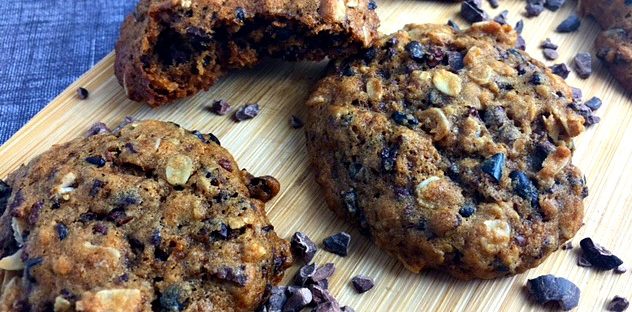
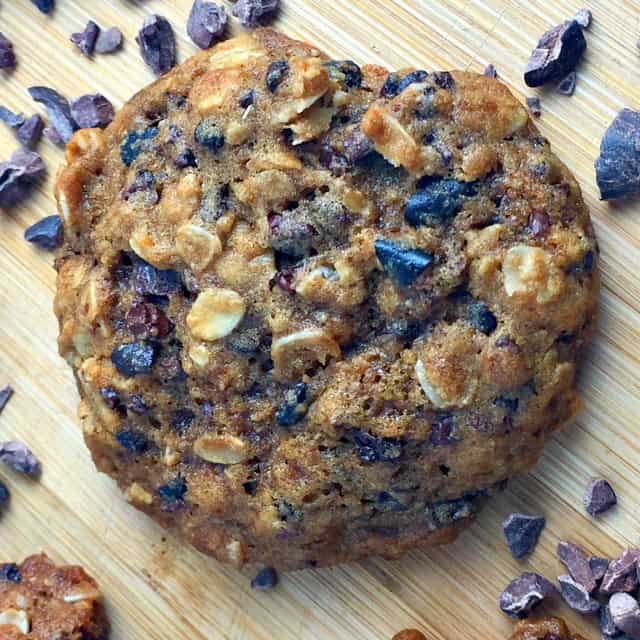
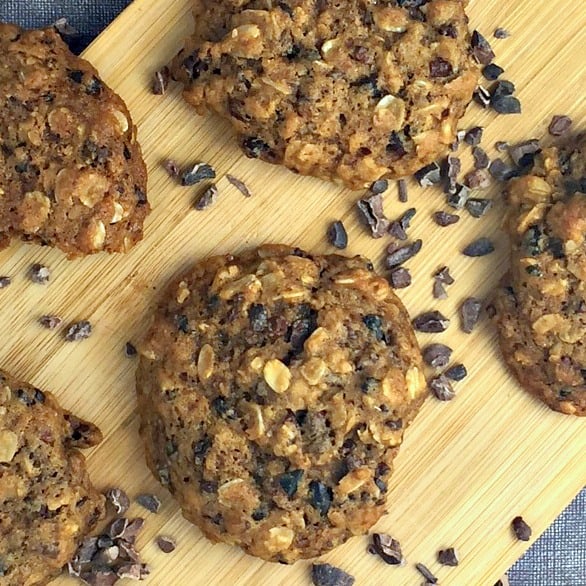
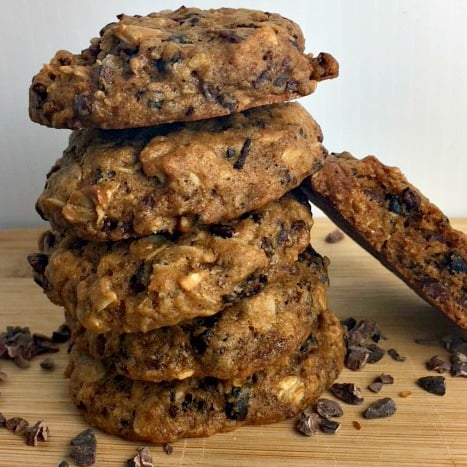
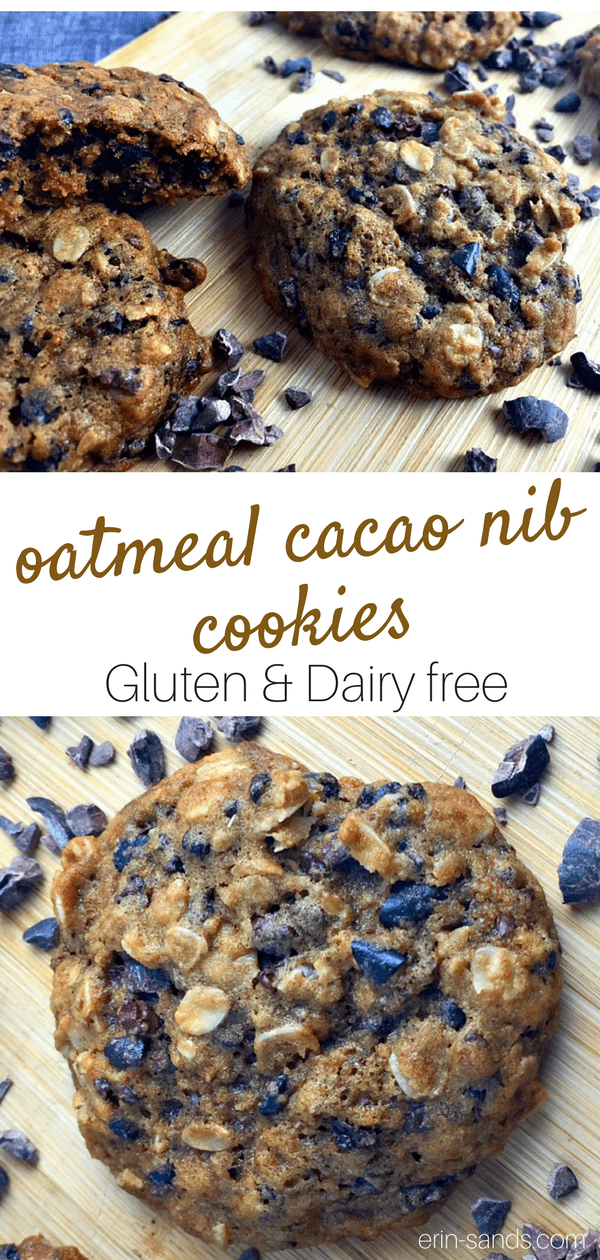
It’s chocolate this week! These oatmeal cacao nib cookies are made with cacao nibs instead of chocolate chips for an intense chocolate flavor with a crispy crunch!
What are Cacao Nibs?
Cacao nibs are from the cacao beans that grow inside the cacao plant. The beans are dried and fermented. The dried beans are ground up into chocolate tasting nibs. They still contain all of their nutrients with no added sugar before they are heated and made into cocoa powder which is used for chocolate bars.
Health Food?
If you needed an excuse to eat more chocolate, raw cacao has four times the amount of anti-oxidants than dark chocolate. It contains several nutrients such as magnesium, calcium, thiamin, carotene, calcium, protein, and riboflavin. It has been found to lower cholesterol, prevent heart disease, and reduce your risk of cancer.
MOod Booster
You probably know that chocolate also affects your mood. That is because of the phenylethylamine, which is a natural chemical that can elevate your mood. That’s why so many of us reach for chocolate when we are sad or feeling stressed. Cacao also causes the brain to release endorphins which is why chocolate gives you a feeling of pleasure. It certainly does for me:)
If you think chocolate is a guilty pleasure, rest assured, consuming raw cacao is a health food. It contains less than one gram of sugar and is the perfect addition to smoothies, hot tea, or your Dandy Blend drink.
You can use cacao nibs as a topping for smoothies or acai bowls. They’re also great in muffins or quick breads or as a crunchy topping for myCHOCOLATE AVOCADO MOUSSE! You can find cacao nibs at Whole Foods, HomeGoods, or online.
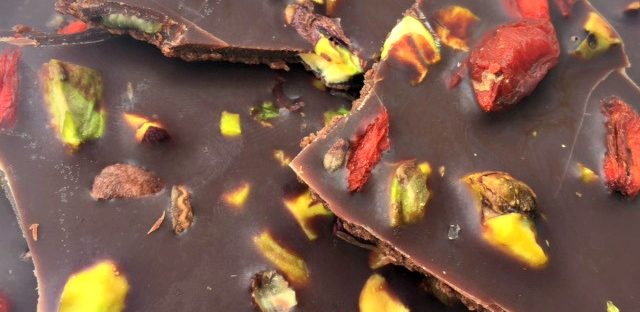
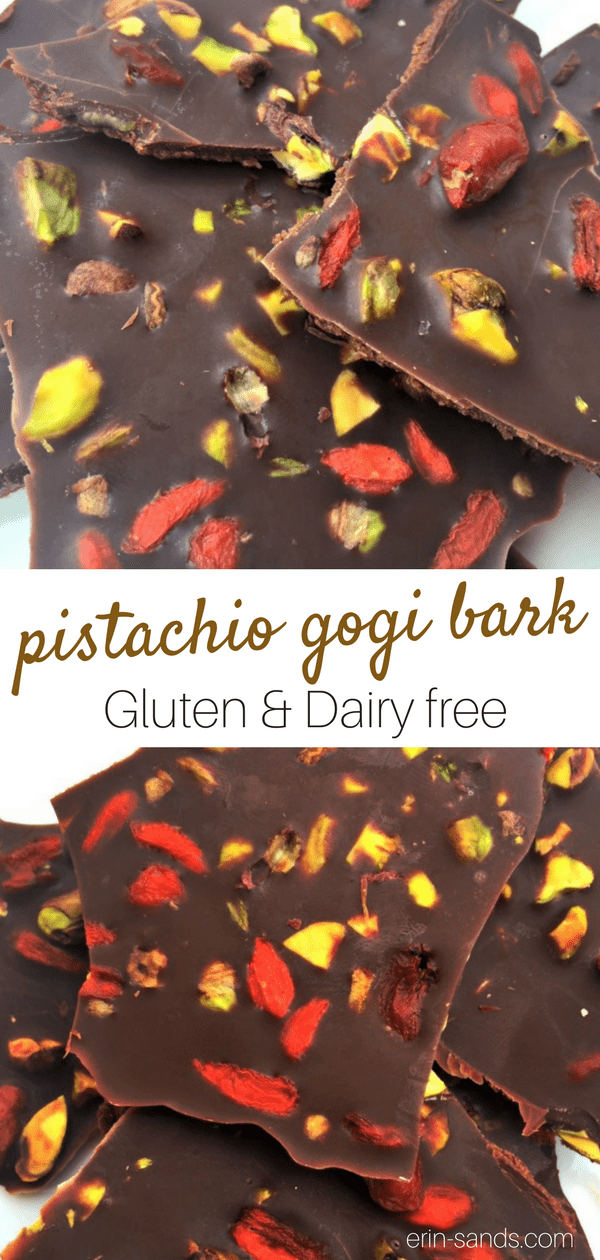
Let me know what you think in the comments below and don’t forget to check out my Pistachio Gogo Bark made of raw cacao powder!
Preheat oven to 350 degrees. Sift baking soda, powder, salt, and Cup4Cup flour together in a medium bowl.
Cream butter with sugar in a stand mixer until smooth. Add egg and vanilla and beat well. Stir in flour and oatmeal. Fold in cacao nibs.
Drop by rounded teaspoon two inches apart on parchment-lined cookie sheet. Flatten slightly with wet fingers. Bake for 10-12 minutes. Cool on wire rack.
Looking for a guilt-free chocolate snack? This homemade pistachio gogi bark takes only 5 minutes and serves up some super power goodness like raw cacao powder and gogi berries. Cacao is high in magnesium, minerals, and antioxidants and gogi berries have amazing anti-inflammatory power and protect against cancer and heart disease.
Heat cocoa butter and coconut oil over a double boiler. Once melted add cacao, honey, and salt and whisk until smooth.
Line an 8X8 baking pan with parchment paper. Pour the melted chocolate into the pan and spread the chocolate into a thin, even layer. Sprinkle the pistachios and goji berries on top of the chocolate. Freeze for about 10 minutes to harden and then break into pieces. Keep refrigerated.
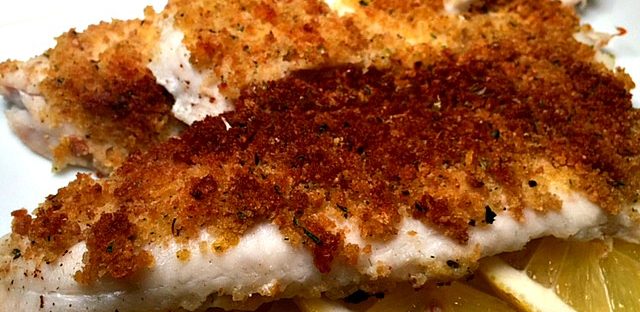
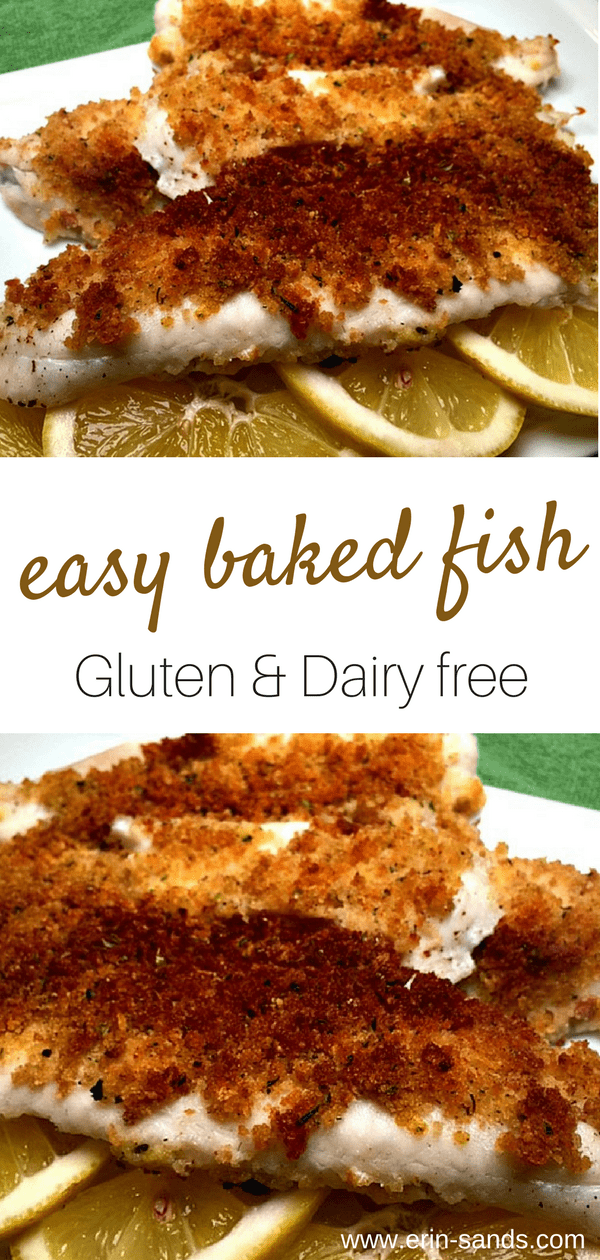
You can have this meal on the table in 15 minutes, paired with a side salad. This is a great use for that leftover almond meal from your homemade almond milk. You can dry the pulp in the oven at 150 degrees for about 4 hours. Process them in a blender to break up the clumps. You could also use gluten-free bread crumbs for this easy baked fish.
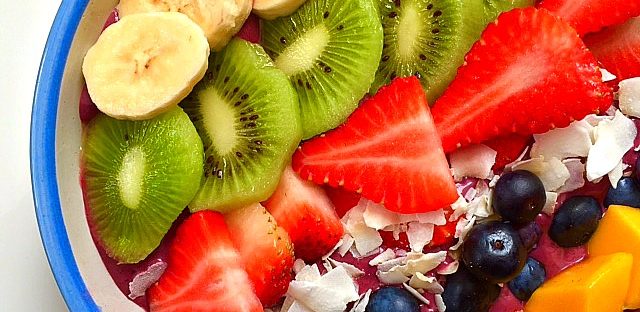
I love acai bowls! These nutrient-packed berries make a beautiful breakfast in a bowl that everyone will enjoy! Loaded with antioxidants, amino acids, and essential fatty acids, acai berries make a super-healthy start to your day.
Trader Joes just started carrying frozen organic acai puree at a great price, so these are even easier to put together. They are basically a thick smoothie in a bowl topped with your favorite toppings such as granola, fruit, coconut, or nuts. Remember, you want fat, fiber, and protein at every meal or snack, so simply follow this basic recipe and mix and match ingredients and toppings!
Print Recipe
Acai Bowl
Mix and match ingredients. Try adding spinach or kale or different combinations of berries and fruit. Add a scoop of protein powder for a protein punch. You can make a chocolate acai bowl by adding a tablespoon of raw cacao.
Defrost acai puree slightly by running under water. Puree acai, banana, berries, and avocado with almond milk until smooth, scraping down sides of blender.
Pour into a bowl and arrange toppings in stripes. Enjoy!
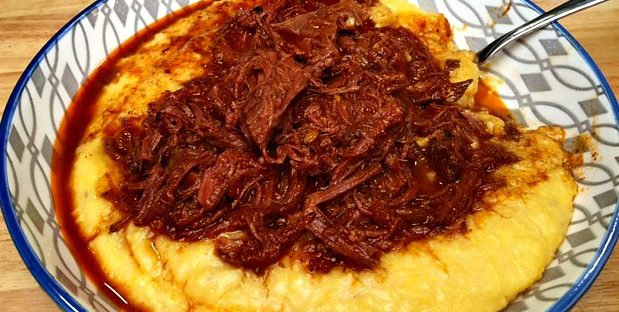
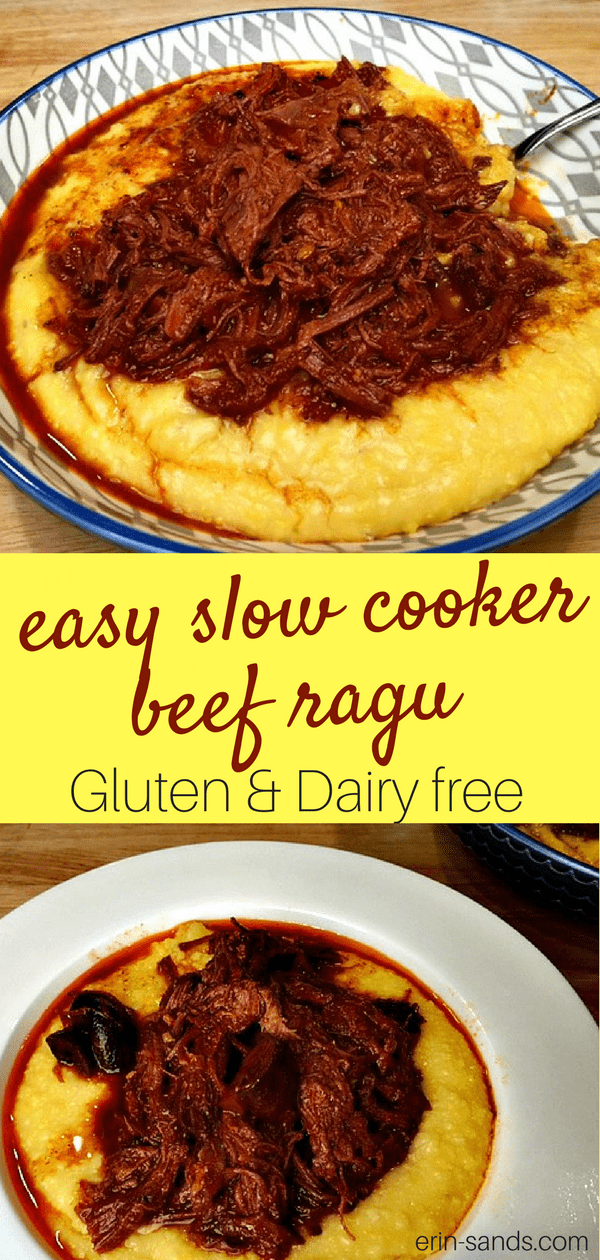
Here is a rich easy slow cooker beef ragu sauce using an inexpensive cut of beef that you can prep the night before, and turn on in the morning for a hearty meal. We love it over creamy polenta, but a pound of gluten-free pasta would be delicious also!
To skip browning the meat, I just cooked up the onions with the spices and tomato paste to add hearty meaty flavor you get from browning. Putting the roast in whole, saves time and energy, as it is so tender and easy to shred after hours in the slow cooker.
Season beef with salt and pepper and place in slow cooker.
Heat oil in skillet over medium heat. Add onions and cook until softened. Add garlic, spices, tomato paste and anchovies. Cook until just starting to brown.
Add wine and stir to scrape up any browned bits in the pan. Pour mixture over beef and add remaining ingedients. Cook on low for 8-10 hours, or on high 4-6 hours.
Transfer beef to cutting board. Using fork, shred it into bite size pieces, removing any large pieces of fat. Skim the excess fat from the sauce and return the beef to to pot. Adjust season to taste. Serve over creamy polenta or gluten-free pasta.
Recipe Notes
The sauce can be made ahead and refrigerated up to two days or frozen for up to months.
I don’t even know why we color Easter eggs since we don’t teach our kids there is an Easter bunny. I still don’t even know what eggs have to do with a bunny. I do however have fond memories of coloring eggs in my childhood and my kids have grown to love the tradition as well. I wanted to find a way how to color your Easter eggs naturally.
Egg shells are permeable
Ever notice how the egg inside turns the color of the dye? Well, eggs are permeable, and I do not want my family to be eating those artificial dyes for several reasons. Food dyes have been linked to allergies, hyperactivity, and autoimmune diseases. I also find it disturbing that other countries like the European Union have either banned food dyes or require warning labels on foods that contain them. Why are we still using them in the US?
The natural way
Natural dyes are easier to find these days at health food stores, but did you know your kitchen is full of natural dyes? Here are some natural ways to color your eggs without harming your health. The longer you submerge the eggs in the dye, the deeper the color. Have fun!
Red
Bring 2 cups of water, 1 cup of chopped beets, and 2 tbsp white vinegar to a boil. Reduce heat and simmer for 30 minutes. Strain and cool the liquid.
Blue
Bring 2 cups of water, 1 cup of chopped red cabbage, and 2 tbsp white vinegar to a boil. Reduce heat and simmer for 30 minutes. Strain and cool the liquid.
green
Bring 1 cup of water, 1 cup of chopped spinach or 2 tbsp. spirulina, and 2 tbsp white vinegar to a boil. Reduce heat and simmer for 10 minutes. Strain and cool the liquid.
Yellow/Orange
Bring 1 cup of water, 2 tbsp. turmeric, and 2 tbsp white vinegar to a boil. Reduce heat and simmer for 10 minutes. Strain and cool the liquid.
Sources
1.David W. Freeman. “Food Dyes Linked to Allergies, ADHD and Cancer: Group Calls on U.S. to Outlaw Their Use.” CBS News June 29, 2010. http://www.cbsnews.com/8301-504763_162-20009228-10391704.html.
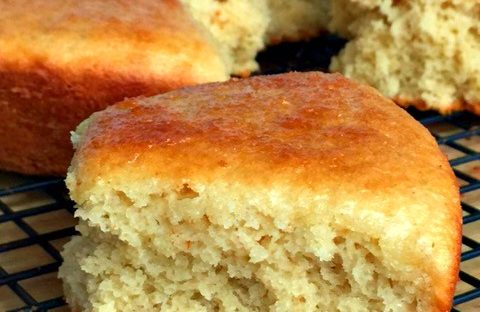
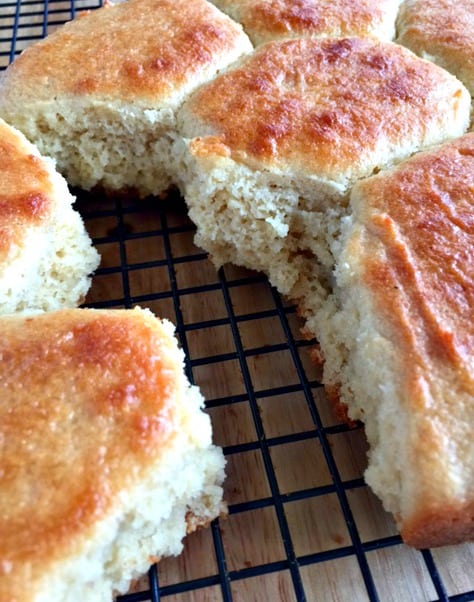
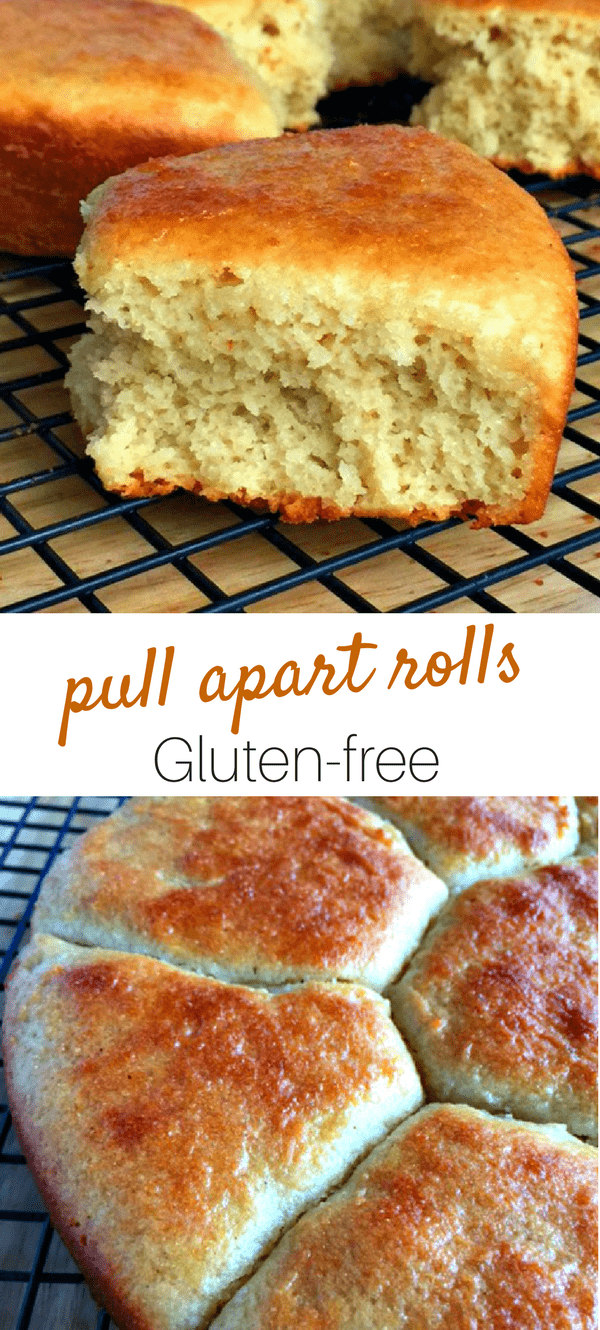
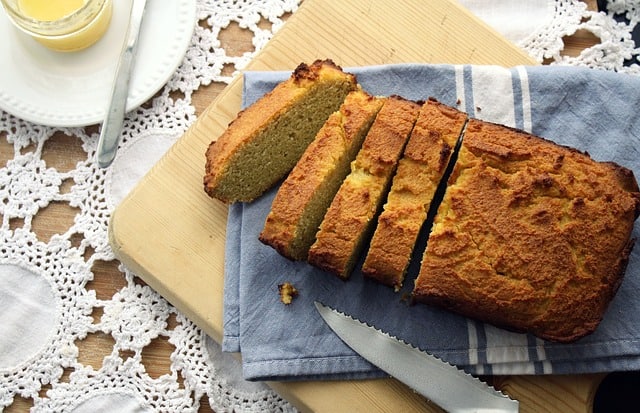
These Gluten-Free Pull Apart Rolls are so good, my son panicked as he thought I gave him a wheat roll! Just in time for the holidays, I finally mastered my recipe. The secret…almond flour. I have been adding more almond flour to my gluten-free bread recipes and getting great results!
Last week, I told you not to eat gluten. This week, I’m showing you how you can make delicious bread and never even miss the wheat! I like to use my own gluten-free flour blends, so we can skip the xantham gum. Xantham gum is usually genetically modified and can cause stomach irritation. Instead, I use psyllium husk, which not only helps bind the dough, it adds heart-healthy fiber!
These rolls are so quick and easy! They only take 45 minutes to rise and 25 minutes to bake, so you can have fresh rolls on the table in just a little over an hour!
Another beautiful thing about gluten-free bread is there is no kneading. Just mix your dough, rise, and bake! These gluten-free pull-apart rolls are crisp on the outside and super soft on the inside. Give them a try! You’re gonna love ’em! Let me know what you think in the comment below!
Whisk all dry ingredients together in mixing bowl of your electric mixer.
Combine all wet ingredients, except butter and add to dry ingredients in bowl. Mix on medium speed for 3 1/2 minutes. This help dough build structure without the gluten.
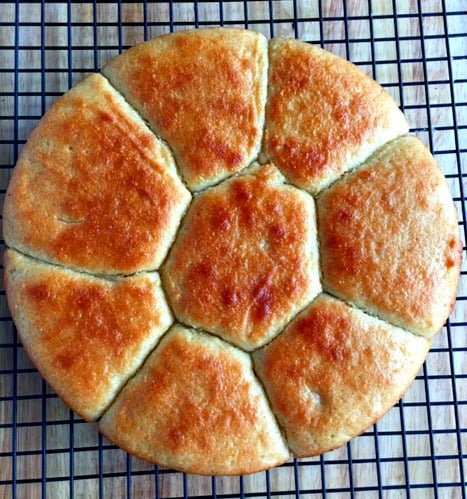
Grease a round 9-inch pie plate or cake pin. Using an ice cream scoop, or 1/3 cup measuring cup, drop dough in mounds into the pan in a circle. Place one in the center. Smooth dough with wet fingers, if necessary. You should get about 8-9 rolls.
Cover with dry towel and let rise for 45 minutes until doubled in size. Preheat oven to 375º.
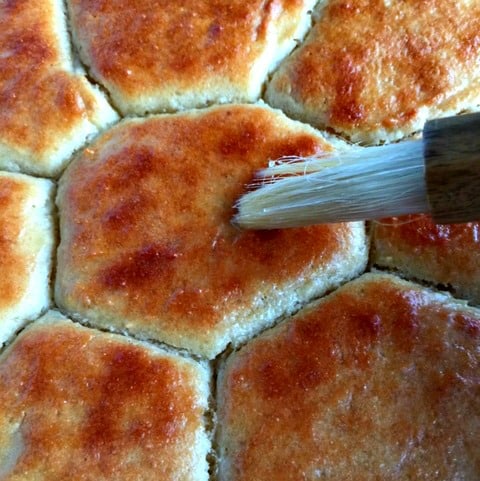
Bake at 375º for 25-28 minutes. Remove from oven and brush the tops of the hot rolls with the melted butter, if desired. Use a large spatula to carefully lift the rolls out of the pan and place them on a cooling rack. Cool completely.
To reheat, cover completely in tin foil and warm in the oven at 350º for 10 minutes.
Why eat gluten-free? That’s a great question! Should we all stop eating gluten? After all, humans have been eating wheat for thousands of years, so what has changed? Why have so many of us become wheat intolerant? Should anyone eat wheat? Well, one thing is clear; modern wheat is making us sick.
Modern Wheat
In the 1950’s, traditional wheat began a transformation. To bring a higher yield from the plant, wheat began to be genetically modified and treated with new pesticides and fertilizers in the interest of producing more wheat and ending starvation around the world. No one ever stopped to consider what they were doing to the nutritional value of wheat. On top of that, wheat is milled in modern processes that transforms it into a nutrient-free white flour, which is how the majority of it is consumed in the world.
Wheat was traditionally harvested while the plant was still alive, therefore leaving the enzymes and nutrients intact. It had a deep strong root that absorbed nutrients from the soil. Modern wheat is known as dwarf wheat, which has a shallow root, absorbing little nutrients, and it is harvested dead. The result is wheat that contains very high amounts of gluten, pesticides, and antinutrients.
Gluten’s effect on the body
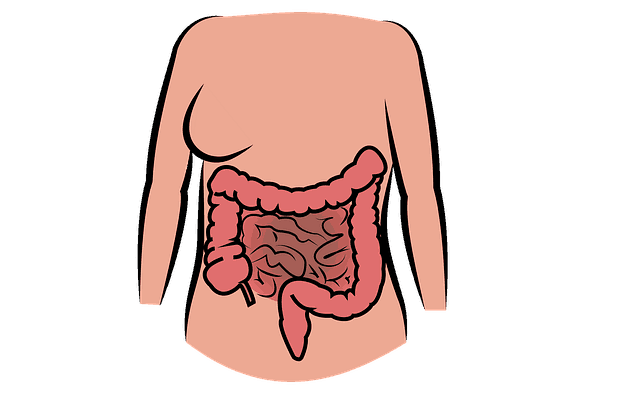
The high amounts of gluten in modern wheat can cause inflammation in the intestinal tract and can lead to a leaky gut. Leaky gut happens when small particles of undigested food “leak” through the intestinal wall and go into the bloodstream. These particles cause inflammation in the body. Leaky gut syndrome leads to many autoimmune diseases which include autism, asthma, ADHD, diabetes, cancer, heart disease, hypothyroid disease, IBS, Crohn’s disease, colitis, and many others.If you already have an auto-immune disease, eating wheat is like pouring fuel on the fire.
Signs of Gluten Intolerance
Many people may not be celiac, but still show signs of gluten intolerance. Symptoms include:
Bloating
Diarrhea, constipation
Abdominal pain
Headache
Fatigue
Exema, psoriasis
Depression
Unexplained weight loss
Anemia
Anxiety
Autoimmune disease
If you are not sure if you are intolerant, a simple way to find out is to eliminate gluten from your diet and see how you feel. Some of us are so used to feeling tired, lethargic, bloated, etc.; you think it is normal. Giving up gluten may be the answer!
Should Everyone EAt gluten-free
Although you may not have the celiac marker, you should still avoid gluten. There have been several recent studies showing that gliadin, a protein component of wheat, causes intestinal damage even in non-celiac individuals. Wheat is also genetically modified and contains a very high amount of pesticides. Other studies have shown that eating wheat contributes to the growth of pathogens in the gut. Remember, all auto-immune disease starts in the gut.
How difficult is it to Eat gluten-free?
I know it may seem so hard eat gluten-free. You want pasta, pizza, and bread. I get it, and I will admit, when we first began eating gluten-free about 18 years ago, it was difficult. There were so few products available, and gluten seemed to be in just about everything that comes in a package or a bottle. Fortunately, it is so simple nowadays. There are so many delicious alternatives to wheat products, you’ll never miss it! Grocery stores have entire aisles devoted to gluten-free products. Labels are much clearer now and easier to tell if it is gluten-free. Even several restaurants label “gluten-free” on their menus and carry gluten-free products. I see gluten-free menus at pizza restaurants. Even Chick-fil-A sells a gluten-free bun!
Does the Gluten-free label mean healthy?
Many people get diagnosed with celiac or give up gluten for health reasons and turn to processed gluten-free products in the grocery store, that are really just junk food. Most of these products are made from starchy flours and are loaded with sugar and salt. On top of that, food companies have jumped on the bandwagon of labeling things “gluten-free”, trying to convince people it is health food. They include ingredients like white rice flour, tapioca starch, potato starch, cornstarch, sugar, xanthum gum, and guar gum. These ingredients are highly refined and have no nutritional value. Even my husband had brought home chocolate cookies, claiming, “They’re healthy, it says gluten-free!” They were not healthy.
Best Gluten-free food
Making food homemade is always best, but there are plenty of healthy gluten-free products out there. My blog is full of recipes that are all gluten-free. I use ingredients like brown rice, sorghum flour, arrowroot flour, millet flour, almond flour, coconut flour, teff flour, garbanzo bean flour, and tiger nut flour. They are all whole grains loaded with nutrients. You can check out the shopping page for some products I recommend.
WHY Eat Gluten Free?
So why eat gluten free? A gluten-free diet is simply better for your health. Once you give it up, you will notice pretty quickly, how much better you feel. You will naturally have more energy, be more alert, be less bloated, and will lose weight more naturally. Give it a try! As always, I am available to help anyone on their journey. If you have questions, please email me or simply enter them in the comments below. Happy Eating!
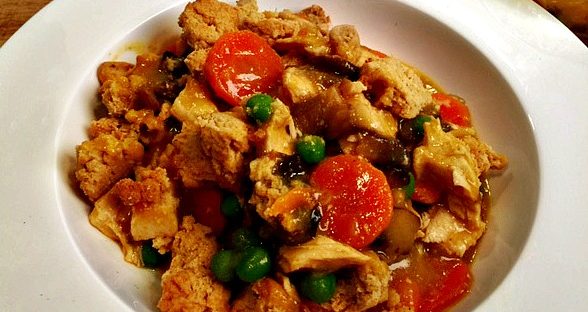
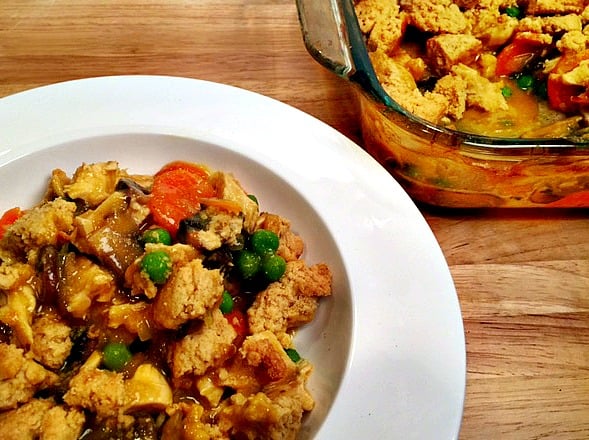
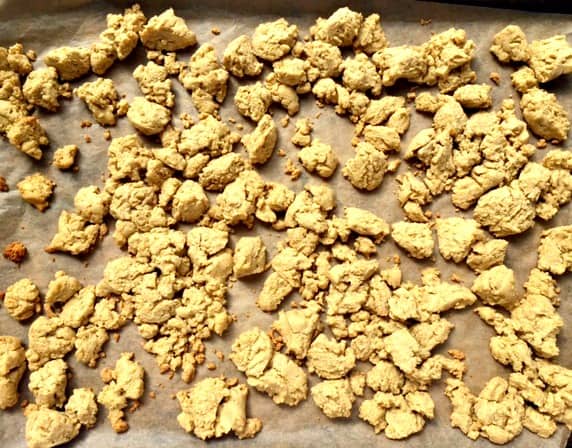
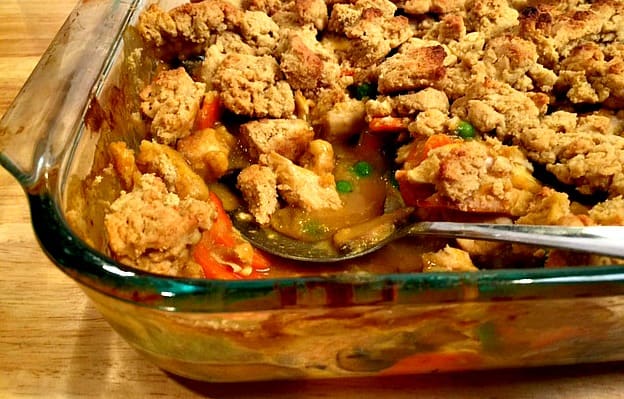
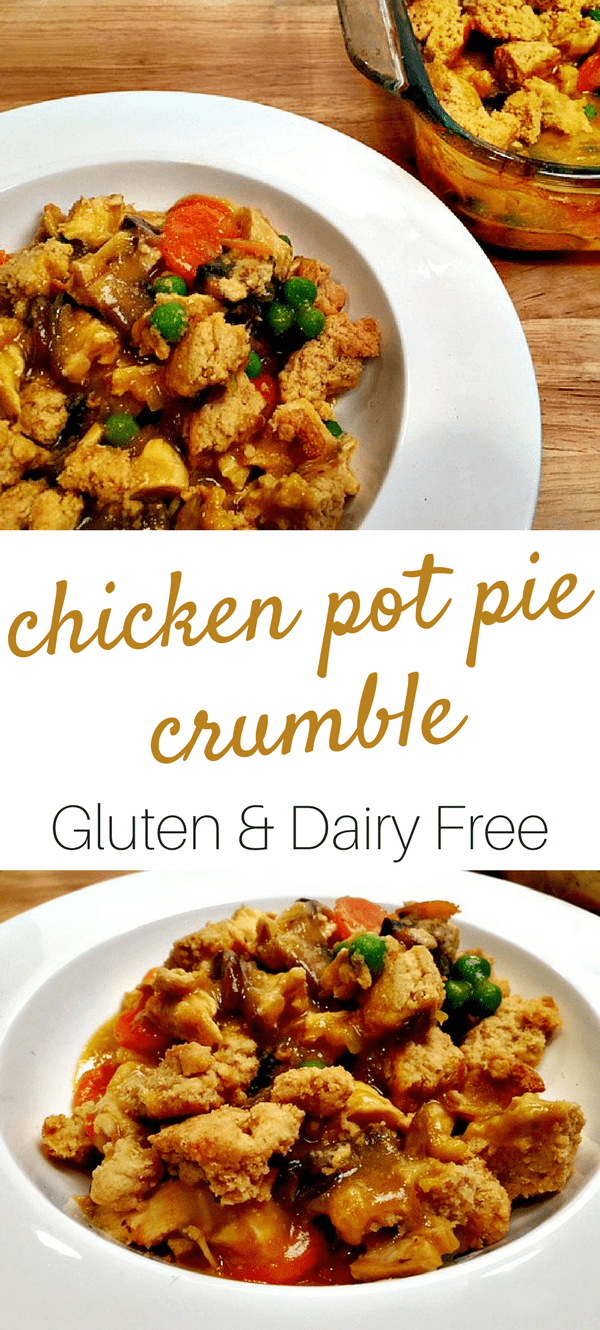
Chicken Pot Pie seems like something you have to give up if you are going gluten and dairy free. Not true! I made this super easy Chicken Pot Pie Crumble recipe that is savory and delicious! I opted for a crumble, as gluten-free pie crust can be a little sticky when you are working with a warm filling. Plus this makes it a quick, weeknight meal. But the crumble topping recipe will work just fine as a pie crust too if you want to go for it!
My inspiration for this recipe came from America’s Test Kitchen. They added just a tiny bit of soy sauce (I used Tamari) and tomato paste to boost the savory flavor. To skip the original dairy in this recipe, I just upped the chicken stock for a creamy sauce. Turmeric and mushrooms give it nice color along with their anti-inflammatory properties. For the crust, I opted for rich coconut milk. This adds silkiness without any trace of coconut flavor. I also added some nutritional yeast for its high Vitamin B content along with its cheesy flavor.
What is ghee?
For the crust, I used ghee instead of butter, but coconut oil will work fine too. Although ghee is derived from dairy, it is pure butterfat, and therefore doesn’t contain the components that cause problems with dairy. It is similar to clarified butter but has more of a nutty flavor. As it is heated, the casein and lactose are removed, which is why it doesn’t cause problems for most people with dairy allergies. If you are sensitive to dairy, try cultured ghee.
I always use grass-fed ghee which is a vibrant yellow color. That’s how you know you are getting a good quality. It contains beta-carotene, Vitamin K2, conjugated linoleic acid, Vitamin A, and Omega-3 fats. These nutrients help the body burn fat, prevent cancer, and reduce inflammation.
I also love how this is a one-dish meal, that you can easily freeze as a ready-made meal. Classic, simple, delicious…without gluten or dairy. Enjoy!
Combine flour, baking powder, salt, and nutritional yeast. Using a fork or pastry cutter, cut in ghee or coconut oil until mixture resembles coarse peas. Add coconut milk and stir to combine.
Spread the topping in pieces on your baking sheet. I find using a scissor to break off pieces of dough makes this quick and easy. Bake for 12-15 minutes until just starting to brown. Set aside.
Filling
To cook the chicken, simmer it in the broth, covered, for about 12 minutes. Remove chicken and allow to cool. Reserve broth. While vegetables are cooking, shred the chicken.
Heat 2 tablespoons ghee or olive oil to a large pot or Dutch oven over medium heat. Add onion, carrots, and celery and 1/4 teaspoon salt. Cover and cook for about 5 minutes. Remove lid and add the mushrooms. Cook for about 5 minutes, until their liquid is released. Add the tamari, tomato paste, thyme, and turmeric and cook until just starting to brown.
Add 1/2 cup brown rice flour. Stir and cook for about 1 minutes. Stir in broth. Bring to a boil, reduce heat and simmer for 1 minute until thickened. Remove from heat and stir in lemon juice, shredded chicken and peas. Spread into a 13X9 baking dish or large casserole. Spread crumble topping over filling and bake until bubbly, 15 minutes.
Recipe Notes
This recipe freezes really great. Freeze it before your final bake.